

The AlumniOnline.org includes an option for reunion planners to export a CSV file of classmates which can be used to send email or generate mailing labels.
Sending Email
Gmail, Outlook or just about any other email program may be used but we are going to use Gmail for our example. Complete the following steps to send an email blast to your classmates using Gmail:
- From the Reunion Planner menu, choose “Export Member List”.
- Open your Gmail account and in the upper right hand corner click on the a Google Apps icon (9 small dots).
- Choose “Contacts”.
- Choose “Import”.
- Select the export file, apply a label for your contacts and click “Import”.
- Return to Gmail, compose your email and select the contacts from the label created in step 6.
Refer to the links below for steps to complete a mail merge in other popular email system. The export file may be edited as needed using Excel, Google Sheets or Open Office Sheets.
Google Premium Gmail Mail Merge
Generate Mailing Labels
Google Sheets, Excel, Open Office or about any office program may be used but we are going to use Google Sheets for our example. Complete the following steps to generate mailing labels in Google Sheets:
- From the Reunion Planner menu, choose “Export Member List”.
- Open your Gmail account and in the upper right hand corner click on the a Google Apps icon (9 small dots).
- Choose “Drive”.
- Choose “New > File Upload”.
- Select the export file and click “Open”.
- Once the upload completes click on the uploaded file and choose “Open With > Google Sheets”.
- Click on “Extensions > Add Ons > Get Add Ons”.
- Type “labels” in the search box and click on “Foxy Labels”. We selected Foxy Labels because they include up to 100 labels for free, but you may choose any label extension that you like.
- Choose “Install”.
- Click “Continue”.
- Choose your Gmail account.
- Choose “Continue”.
- Choose “Allow”.
- Choose “Next”.
- Click “Done”.
- Close out of the dialog.
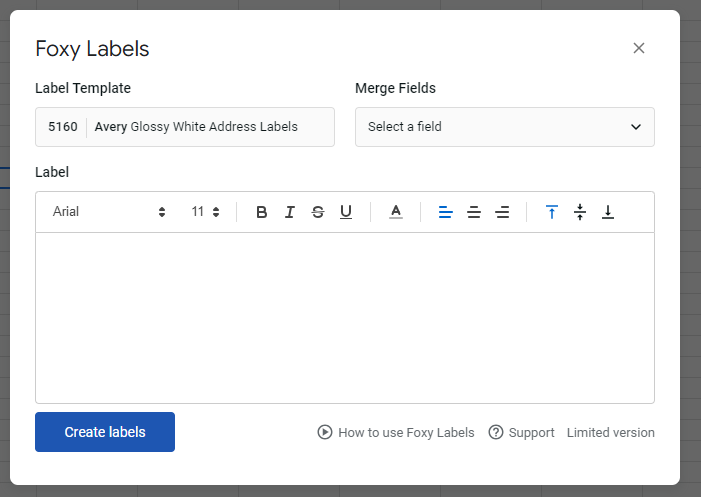
- Choose “Extensions > Fox Labels > Create Labels”. (Figure #1)
- Choose the label template that you want to use. Printable labels to match the various templates may be purchased online or at your local office supply store or you may simply print to a piece of paper and cut them out.
- Choose “Merge Fields” and click on NAME.
- Choose “Merge Fields” and click on FULL MAILING ADDRESS
- In the label field, move the mailing address to a new line.
- Click “Create Labels”.
- Click “Open”.
- Place your label template in the printer and choose “Print”. Be sure to print a test page before printing the actual labels to ensure they print correctly.
Foxy Labels Extension